

Creating users
This page explains how an administrator creates or approves DNA-Nexus user accounts.
Choose the correct user creation flow
DNA-Nexus can create users in different ways depending on which authentication method is enabled. These flows are intentionally separate because the administrator steps are different for each login mode.
Create or receive a user registration
The user account may be created by an administrator or requested by the user from the login page.
Review user details
Check the username, display name, role and intended storage quota.
Approve the user
Approve the user when the account is ready to access the server.
Tell the user to sign in
After approval, the user can sign in and start using DNA-Nexus apps.
Flow 1: Adding users with QR / DNA Connect
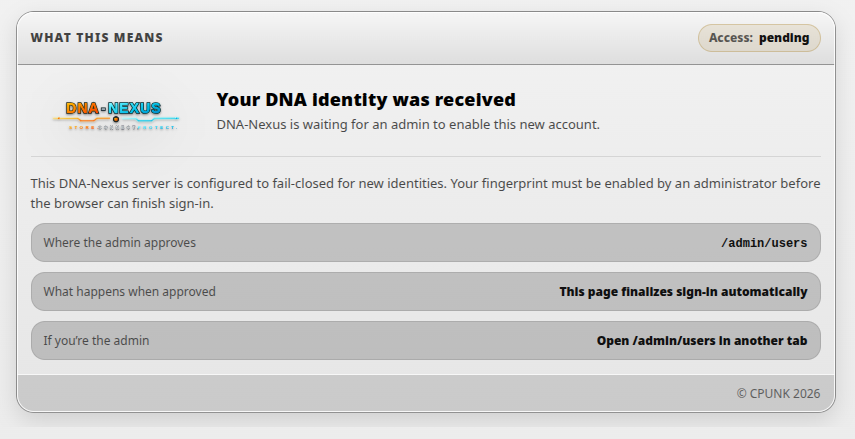
When QR / DNA Connect authentication is enabled, new users are created from the login page. The user scans the QR code with the DNA Connect mobile app, completes the login flow, and then waits for administrator approval.
In this mode, the administrator does not create the first account record manually. The server receives the user identity from the QR login flow and places the account into a pending state.
1. User scans the QR code
The user opens the login page and scans the displayed QR code with DNA Connect. After the scan succeeds, the browser shows a message telling the user to wait for administrator approval.
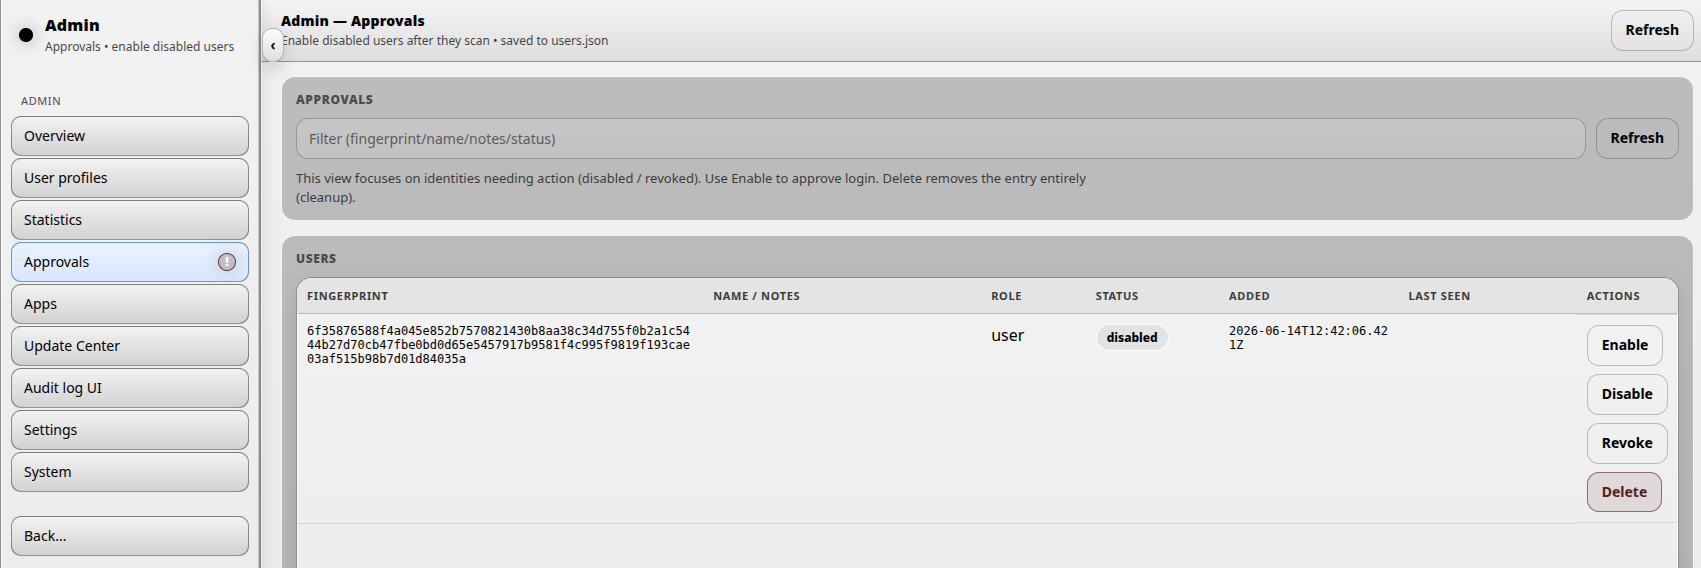
2. Administrator approves the user
When a new pending user is waiting, the administrator sees a notification in the sidebar. Open the Approvals section to review the pending account.
Click Enable to activate the account. After this, the user disappears from the approvals page and becomes available on the User profiles page.
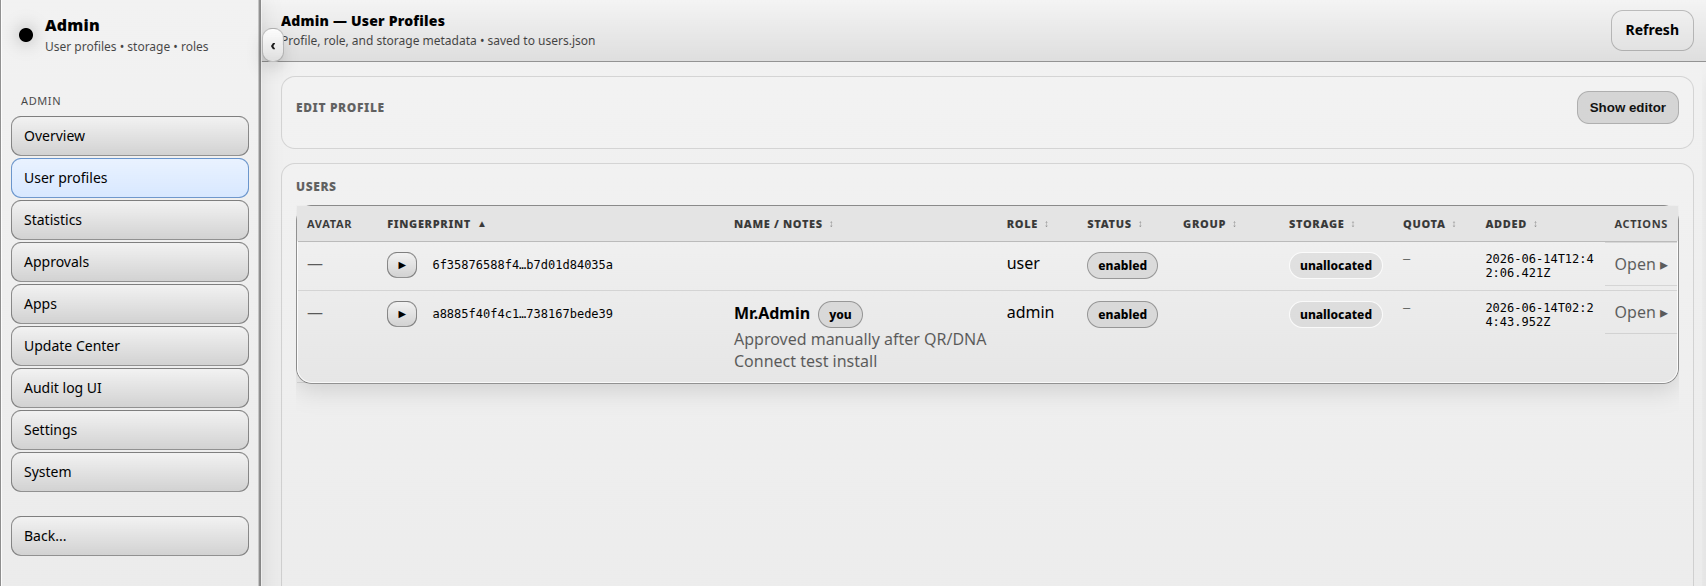
3. Complete the user profile
After approval, open the user on the User profiles page. The administrator can edit the user’s display name, email address, role, notes and avatar.
4. Allocate storage
The most important follow-up task is usually storage allocation. A user may be enabled, but still needs a storage quota before normal uploads are possible.
Click Allocate on the user profile. The allocation dialog lets the administrator choose a storage pool and assign a quota in gigabytes.
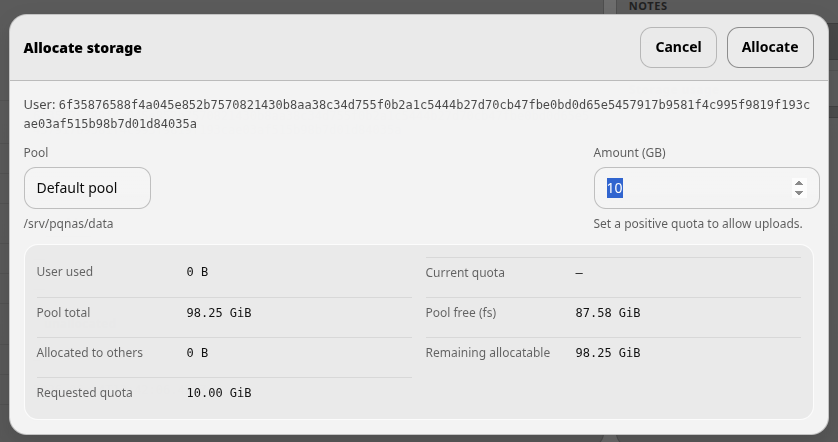
The dialog shows both the requested quota and current pool capacity information. This helps the administrator avoid assigning more storage than the pool should safely reserve.
- User currently uses shows the user’s current storage usage.
- Current quota shows the existing quota, if one has already been assigned.
- Pool total size shows the total size of the selected storage pool.
- Pool free space shows the current free filesystem space.
- Reserved for others shows quota already assigned to other users.
- Remaining reservable shows how much quota can still be assigned safely.
- Requested quota shows the quota currently being assigned.
Flow 2: Adding users with OPAQUE / zero-knowledge password
When OPAQUE authentication is enabled, administrators create new users from the Approvals section. OPAQUE is a zero-knowledge password authentication flow: the user password is processed in the user’s browser and is not sent to the server as a traditional login secret.
1. Administrator creates the OPAQUE setup link
Open Admin → Approvals. In the Create OPAQUE user panel, enter the user’s name and login/email address. These two fields are required. The administrator may also choose the user role and an optional storage quota, but storage allocation is not required at this stage.
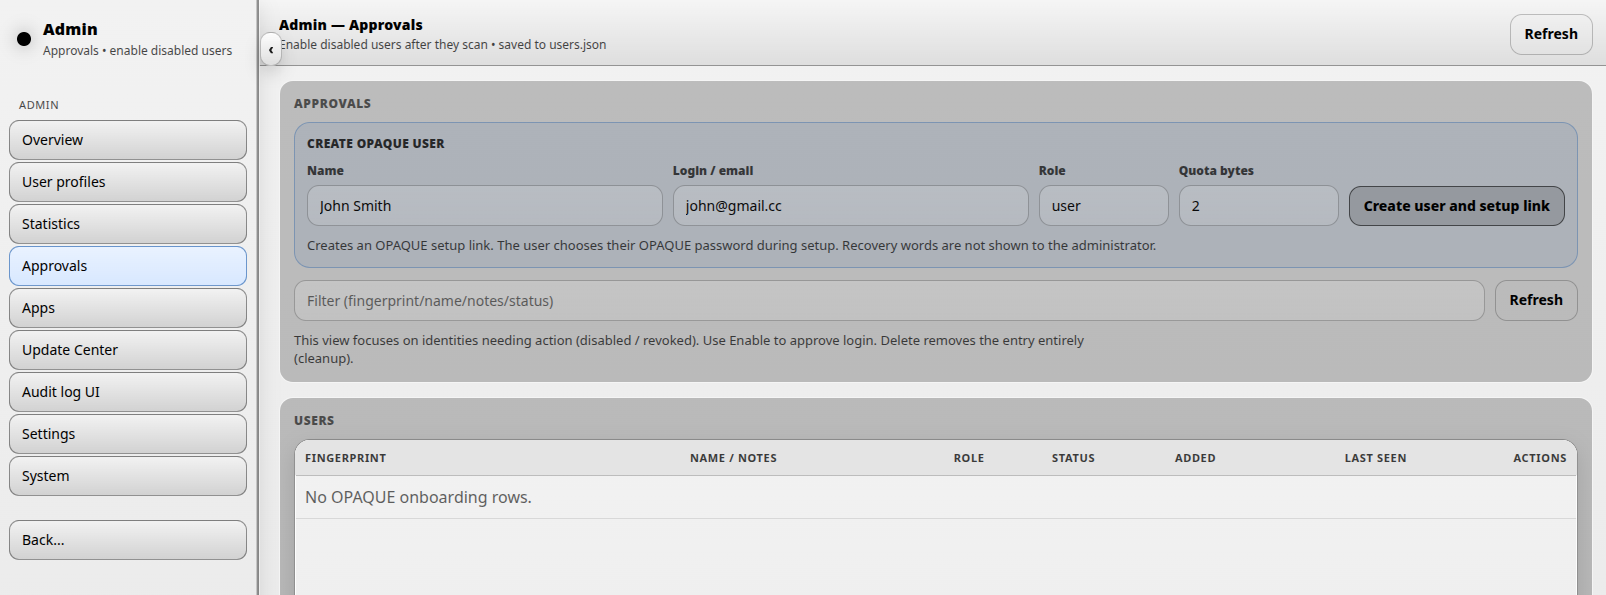
Click Create user and setup link. DNA-Nexus creates a single-use setup link and shows it in a confirmation card. The administrator can click Copy link to copy the setup URL.
At this point, the actual user identity has not been fully created yet. The pending setup entry is waiting for the user to open the link and set their password.
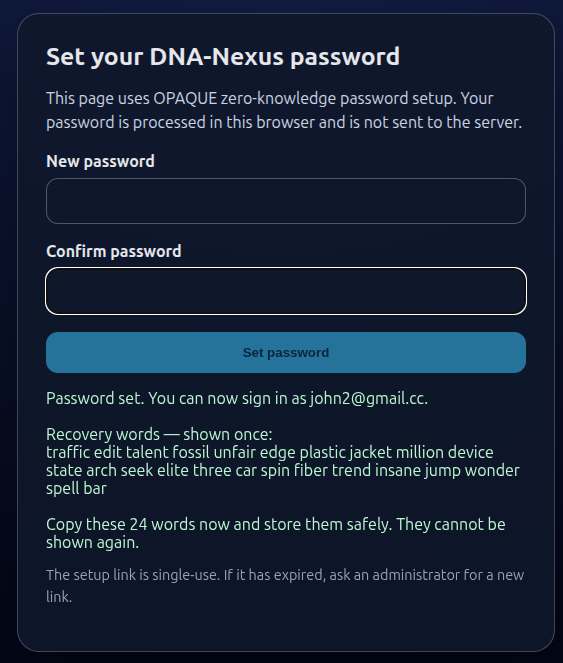
2. User opens the setup link and sets a password
The user opens the setup link and enters a new password. The OPAQUE registration happens between the browser and the server without sending the plaintext password to the server.
During this setup step, DNA-Nexus creates the user’s fingerprint and 24 recovery words. The recovery words are shown to the user only once.
3. User appears in User profiles
After the setup flow is completed, the user appears on the User profiles page. From there, administrators can manage the user in the same way as users created through the QR / DNA Connect flow.
Typical follow-up tasks include editing the display name or notes, changing the role, checking the account status and allocating storage. If the user needs file uploads, make sure a positive storage quota is assigned.
4. Password reset and OPAQUE user actions
If an OPAQUE user forgets their password, go back to the Approvals page. The list may look empty by default because completed users are hidden from the action-focused view. Use the filter field to search by name, email address or another known value.
When the user is found, the administrator may see several OPAQUE-specific actions:
- Create reset link creates a new single-use reset link. The user opens the link and sets a new OPAQUE password.
- Force reset disables the current OPAQUE credential immediately and creates a new reset link. The user cannot sign in again until the reset link has been completed.
- Revoke / cancel changes the user to a revoked state. Use this when the user should no longer be allowed to sign in, but you want to keep an administrative record of the account.
- Delete removes the user entry completely. This should normally be reserved for cleanup of test data or entries that were created by mistake.
If a user is still pending and has not completed the setup link yet, the user does not have a fingerprint or a full identity. In that case the Approvals page can show a Cancel setup link action. This invalidates the single-use setup link and removes the pending row from the onboarding list.


