Snapshots
DNA-Nexus can create Btrfs filesystem snapshots for configured snapshot volumes. A snapshot stores the state of a selected Btrfs source at a specific moment. Snapshots are useful when you need a fast rollback point for stored NAS data.
The default protected volume is usually the DNA-Nexus data volume at /srv/pqnas/data. Administrators can also add separate Btrfs storage pools, such as /srv/pqnas/pools/pool2, to snapshot protection.
What snapshots include
Snapshots are created from the configured source subvolume or Btrfs source path. In the default configuration, this is:
/srv/pqnas/dataThe snapshots themselves are stored under that volume's configured snapshot root. For the default data volume, this is usually:
/srv/pqnas/.snapshots/dataIn the default configuration, snapshots cover data stored under /srv/pqnas/data. This includes user data, workspaces, avatars and application data files located under that data root.
Snapshots do not automatically include the whole Linux operating system, server binaries, installed application packages, static runtime files or configuration files stored outside the configured Btrfs source.
Protected volumes and pools
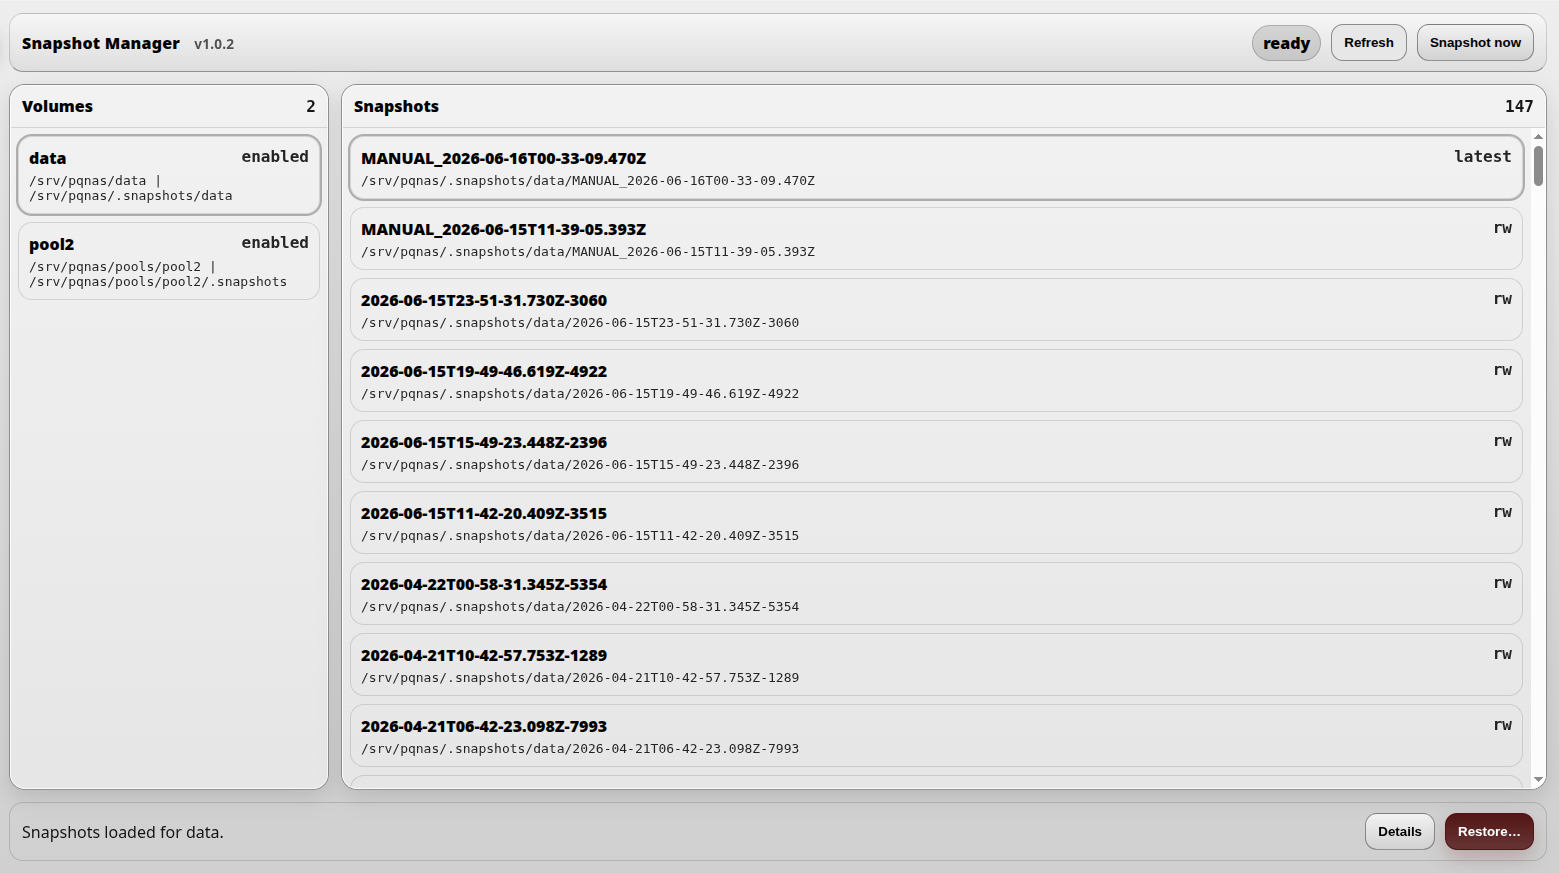
Snapshot protection is configured per volume. Snapshot Manager shows the configured protected volumes on the left. Selecting a volume shows the snapshots available for that volume.
Additional Btrfs storage pools can be added from Administrator settings → Snapshots. For example, a pool mounted at:
/srv/pqnas/pools/pool2normally stores its snapshots inside the pool:
/srv/pqnas/pools/pool2/.snapshotsKeeping the snapshot root inside the same pool is important because Btrfs snapshots must stay on the same Btrfs filesystem as the source.
Requirements
Snapshot support requires Btrfs. Non-Btrfs backends, such as Ext4, cannot use Btrfs snapshot features.
The DNA-Nexus server must also be able to run the required Btrfs commands with sufficient privileges. If snapshot verification or restore actions are disabled, check the Snapshot Manager sudo setup instructions.
Creating a manual snapshot
To create a snapshot manually, select the protected volume in Snapshot Manager and click Create snapshot now.
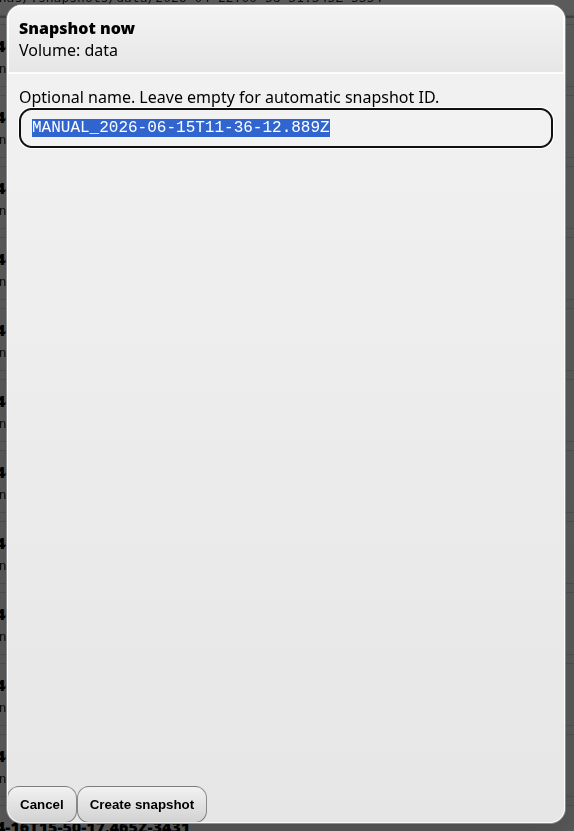
A confirmation dialog is shown with the snapshot name. After confirming, the snapshot is created immediately under that volume's snapshot root.
Restoring a snapshot
To restore an older snapshot, select the protected volume, select the desired snapshot from the list based on its timestamp, and click Restore.
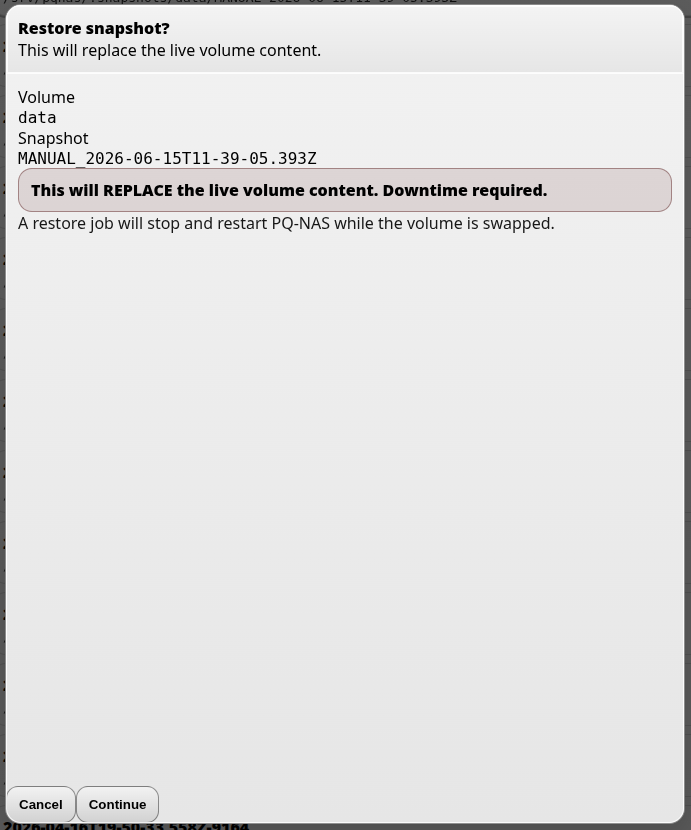
A confirmation prompt is shown before the restore begins. After you accept it, the restore process starts.
During snapshot restore, the server software restarts automatically. In most cases, users will only notice that the service is unavailable for a short time.